
Results in detail.
Leather restoration for vehicle seats and furniture. Explore the examples and compare the documented conditions.
Before & After.
The photographs document individual workshop projects. The possibilities and results depend on the material and its condition.
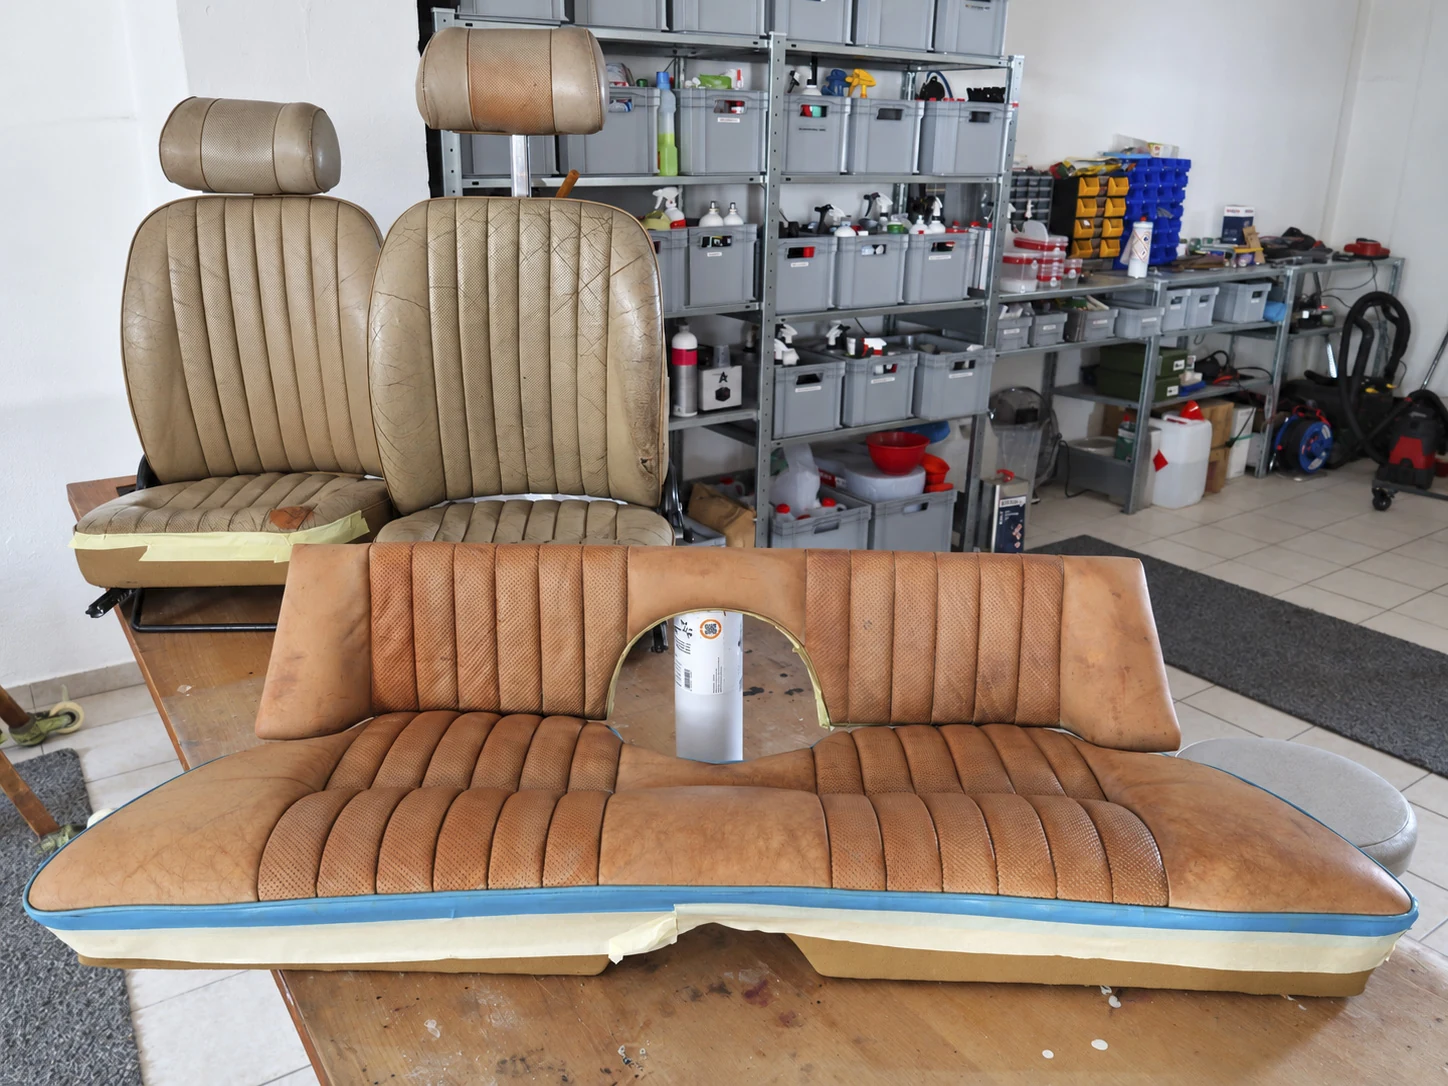
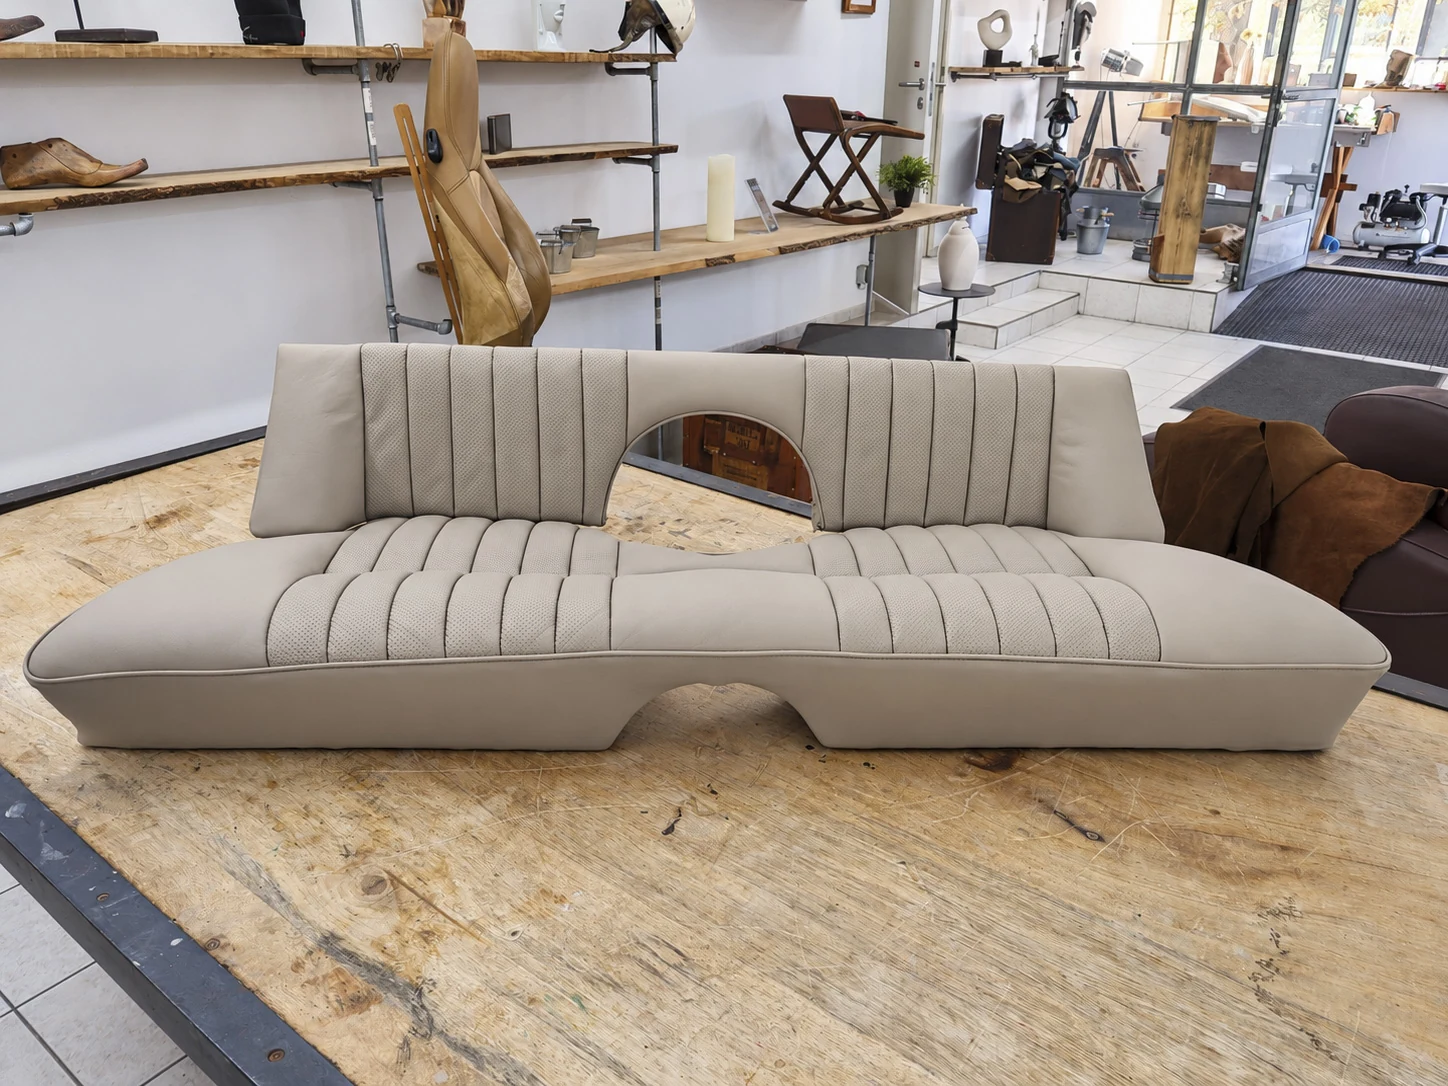
Restoring suppleness takes time.
The leather interior of a Jaguar E-Type: hardened Connolly leather was treated with a specialist fine leather oil over several weeks. The photographs show the work in progress and the fully restored rear bench seat.
Workshop photographs taken from different perspectives. The result depends on the individual condition.
- 01Assess the materialExamine the underlying condition, surface and existing shade.
- 02Care with patienceTreat hardened leather gradually and allow resting periods.
- 03Refine the detailsMatch the shade and desired appearance to the interior.
 AFTER
 BEFORE
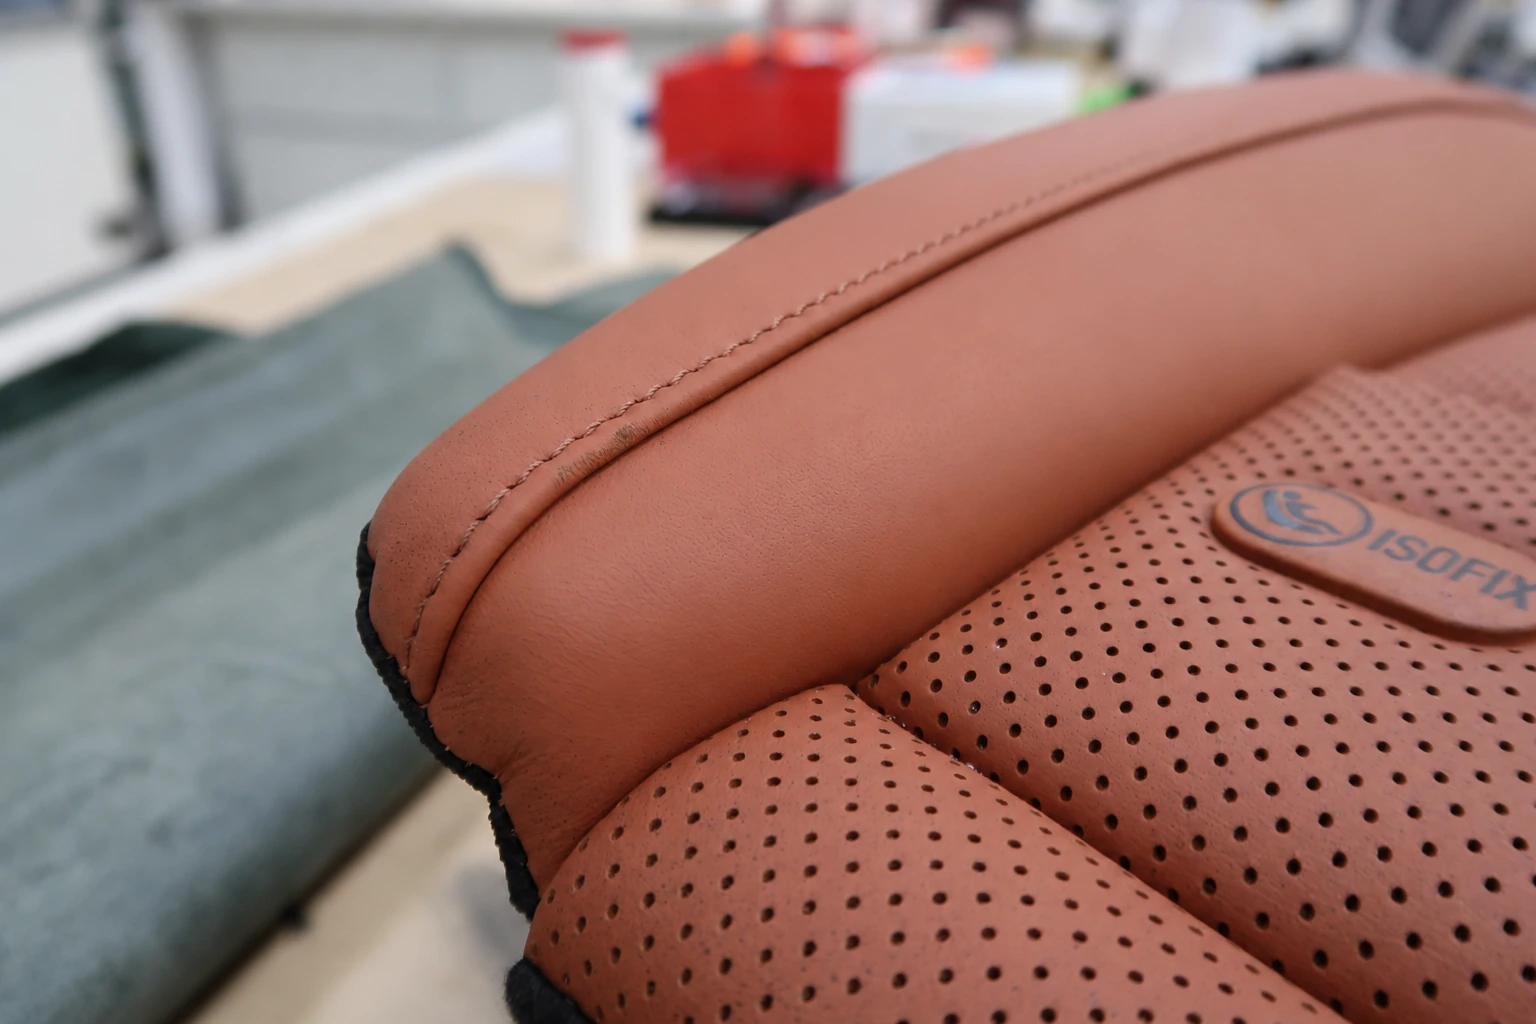
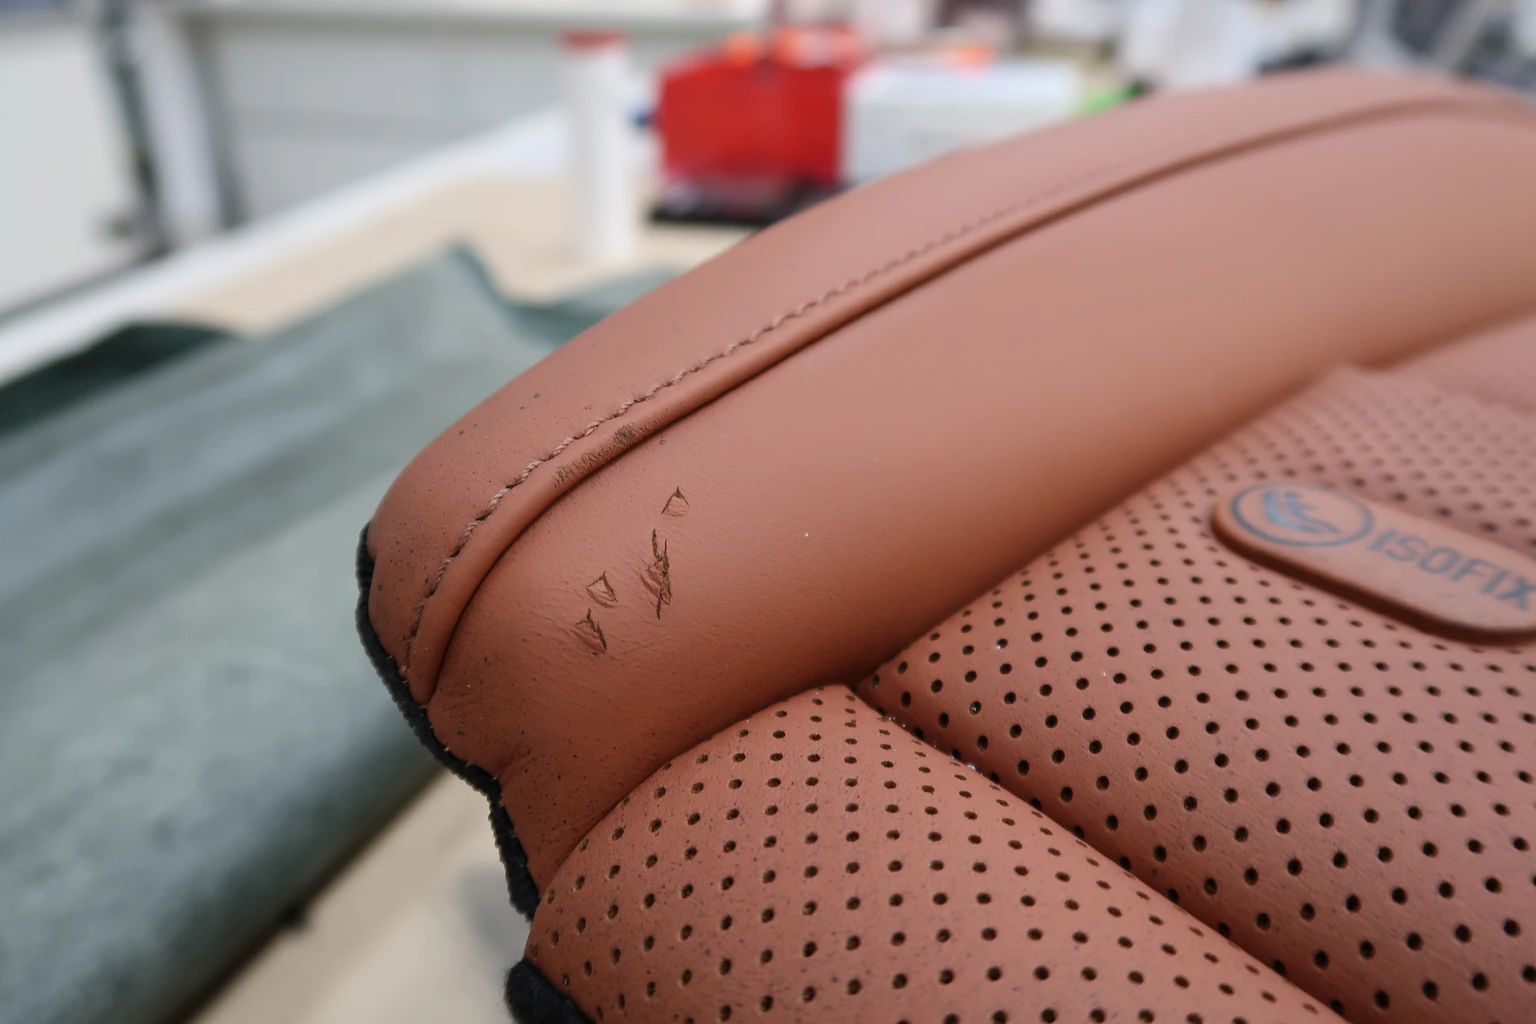
Small areas of damage. Carefully repaired.
The workshop photographs show a damaged side bolster on a seat backrest before and after treatment. Move the dividing line to compare the change in the leather surface directly.
The camera perspective of the after photograph was matched using AI assistance. The result depends on the individual condition.
- 01Assess the conditionExamine the damaged areas and existing leather surface closely.
- 02Treat preciselyTailor the treatment to the material and damage.
- 03Consider the whole interiorTake the shade, grain and adjacent surfaces into account.
 AFTER
 BEFORE
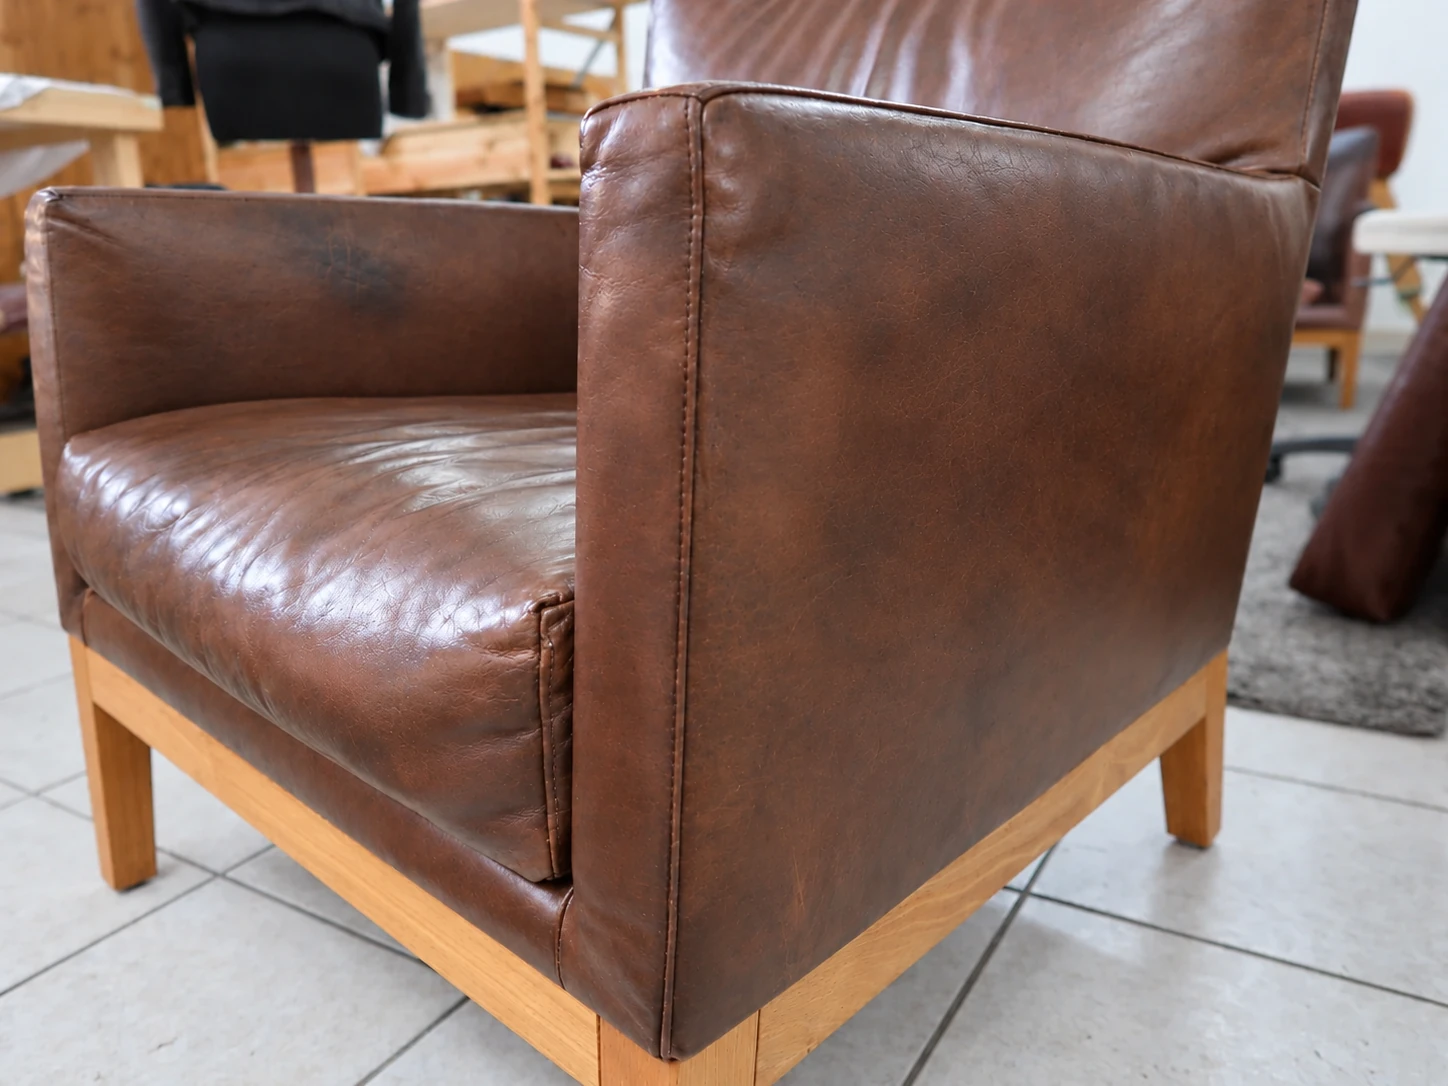
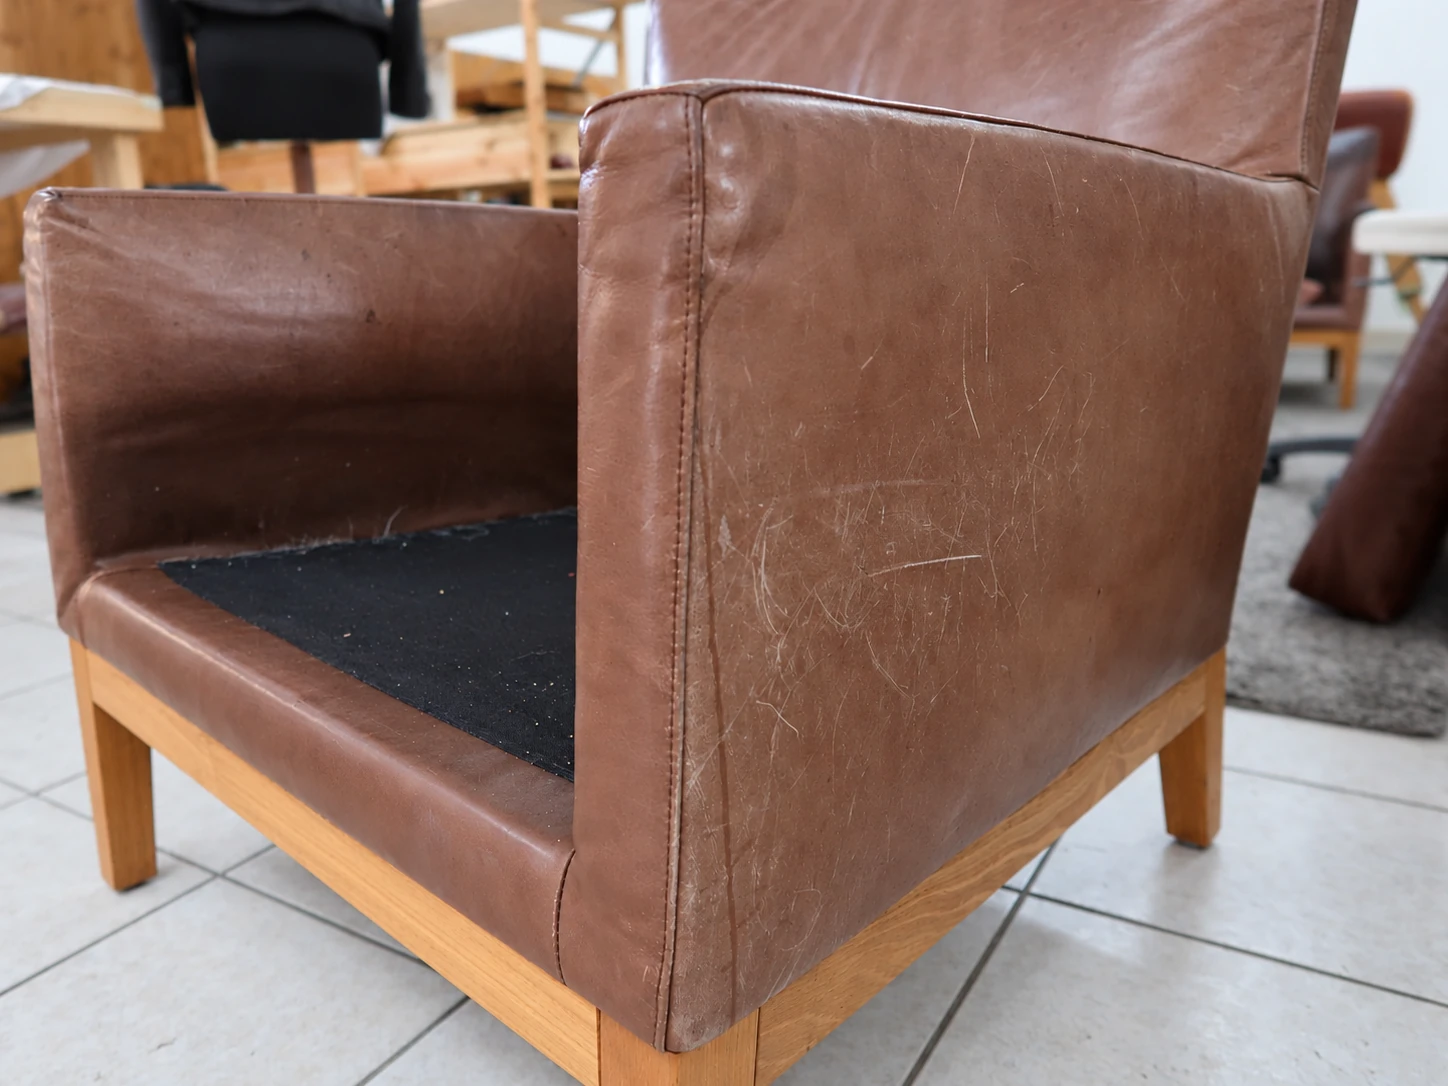
Rediscovering its own colour.
A fine aniline leather armchair with noticeable signs of use. Care tailored to the leather brings out its existing depth of colour without an opaque colour coat. The natural surface remains visible.
The camera perspective of the after photograph was matched using AI assistance. The result depends on the individual condition.
- 01Identify the leatherRecognise and take account of the open-pored surface.
- 02Choose the right treatmentAdapt cleaning and care to the leather's absorbency.
- 03Preserve its characterEnhance the depth of colour without applying an opaque colour coat.
 AFTER
 BEFORE
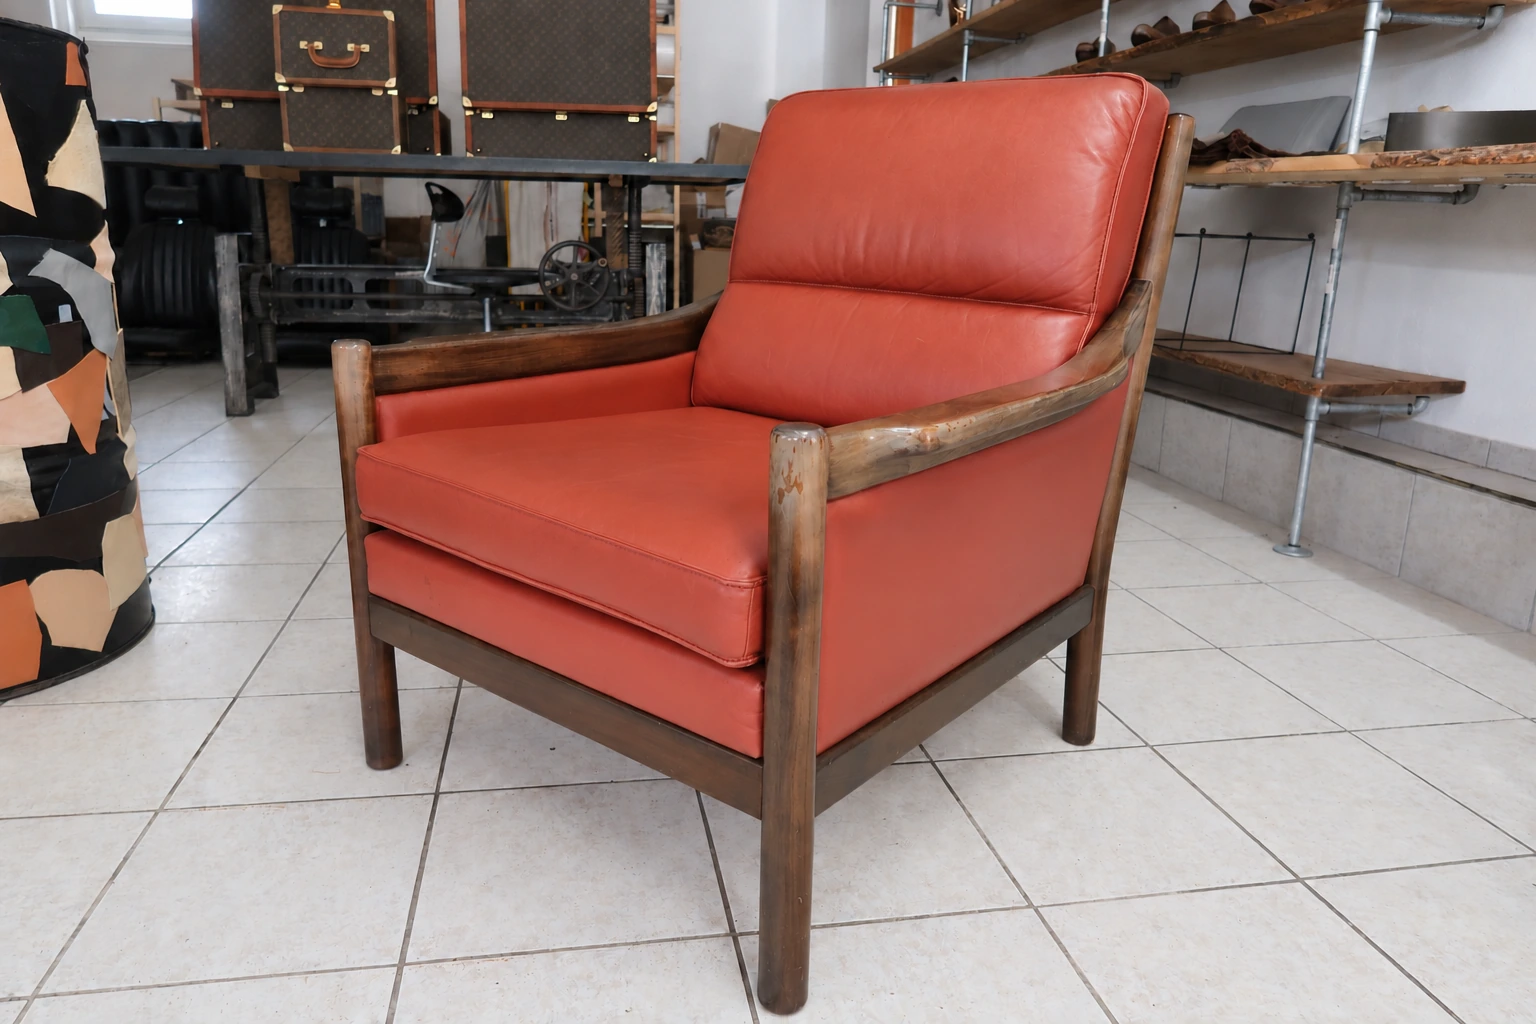
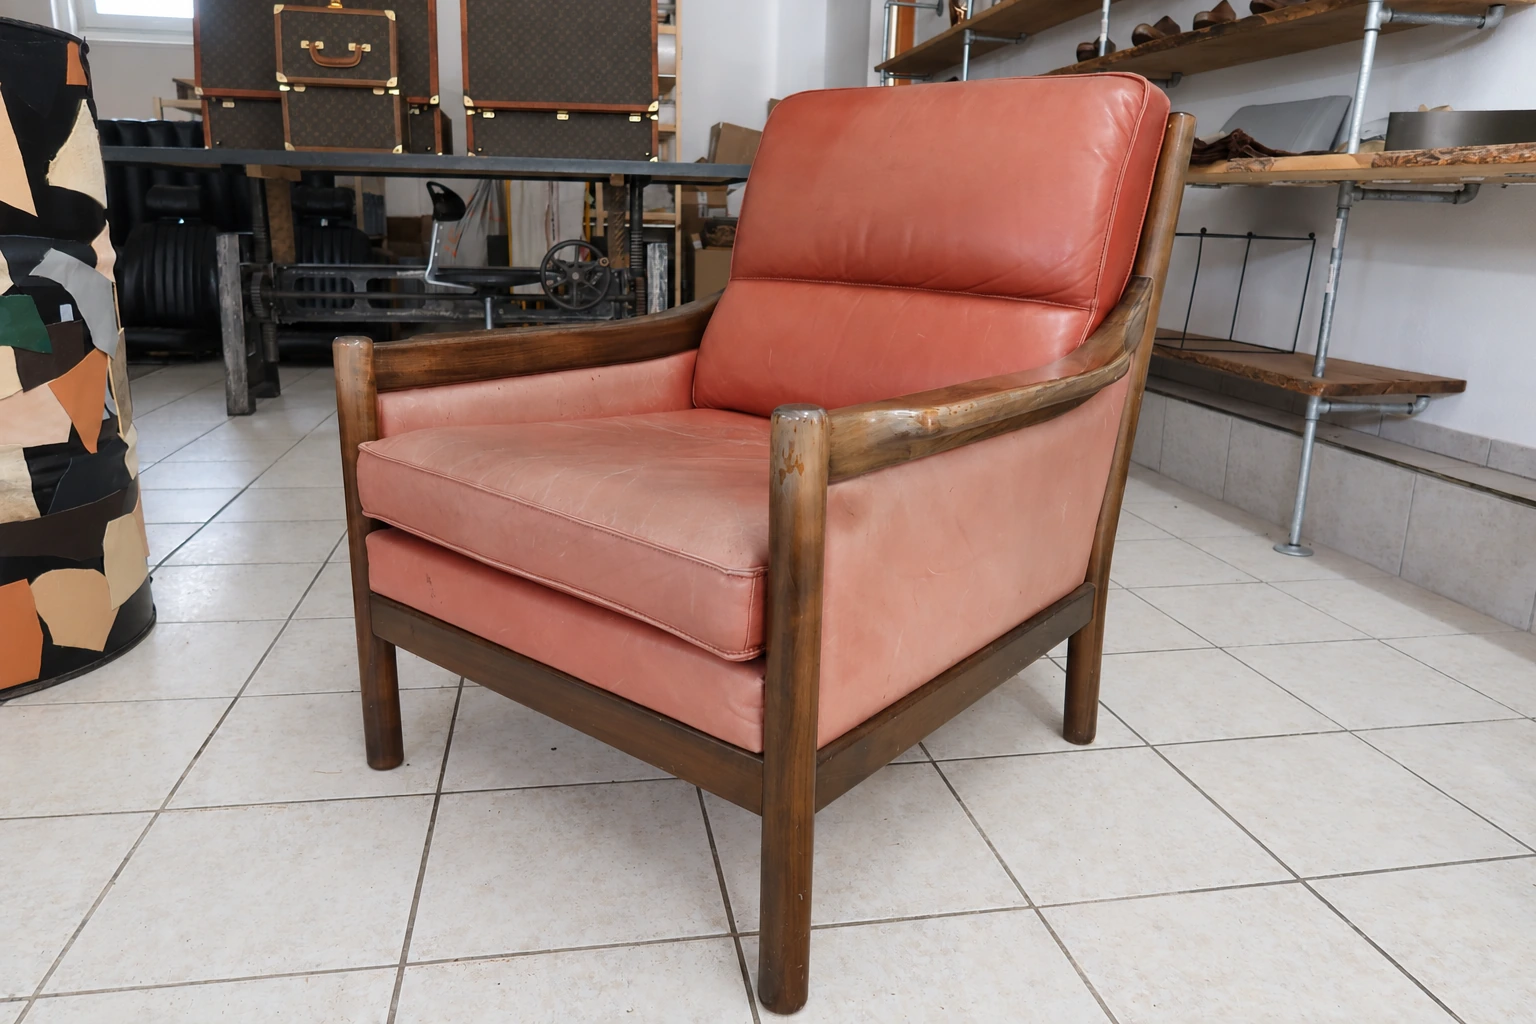
Pigmented Leather
A leather armchair with a faded seat and visible signs of wear, before and after treatment. The direct comparison shows the refreshed colour and more even leather surface.
The camera perspective of the after photograph was matched using AI assistance. The result depends on the individual condition.
- 01Assess the leatherCarefully assess the surface, signs of wear and existing colour.
- 02Agree on the treatmentMatch the treatment to the leather type, its condition and the desired result.
- 03Preserve the overall characterConsider the colour, grain and surrounding areas together.
What story will
your leather tell next?
Describe what you need and the area concerned to prepare your personal enquiry.